Gilding on Ceilings - Apply gold to your ceiling          

Gilding Ceilings

These simple guidelines will help you produce a professionally finished gilt ceiling, wall or large area surface.

Genuine Gold and Silver, Imitation Gold, Imitation Silver and Copper leaf ceilings

Video Special

A step-by-step educational series. Gilding tutorials and gilding information for the beginner, intermediate and advanced gilder.

Ribbon leaf application to ceilings and large area wall surface - This detailed demonstration shows you how to apply genuine gold, silver, imitation gold, aluminum and copper leaf to ceilings and walls using ribbon leaf - or rolls of leaf.


Ceiling Step-by-Step

Gilded ceilings, walls and large surface areas has never been easier!

Ideally suited for large flat areas. Genuine Gold, Silver and Metal Leaf are now readily available in rolls, also referred to as Ribbon Leaf, cutting your production time in half and creating superior gilded results. The following tutorial describes the step-by-step techniques involved in gilding a ceiling with Silver Leaf. The same principles apply to using any form of leaf on a roll, whether it is Imitation Gold leaf, Aluminum, Copper or Genuine Gold.

These simple Gilded Planet guidelines will help you produce a professionally finished, large surface area, gilded project.


Basic Preparation
 

The working surface should be as smooth as possible. 2 coats of high quality primer should be applied, followed by 2 coats finished paint. The base color for the finished paint layer varies depending on your project requirements. A Latex Eggshell finish will provide superior results. To determine a color that is right for your project, visit the Gilded Planet Color learning center.


Applying the Adhesive Sizing

Using a water based size, such as Wunda Size or Aqua Size, allows for easy application and clean-up and extended 'tack' time, allowing you to apply your leaf in a less hurried manner. To learn more about water-based sizes and their properties visit the Water Size Center.

Apply the adhesive size with a short nap roller. While it is still wet, use a high quality brush and soften and smooth the size evenly over the surface. With water-based size, allow to come to 'tack' in approximately 1/2 hour. 'Tack' time for oil based sizing varies depending on the type of size used and environmental conditions, such as temperature and humidity.

For more information on oil-based sizes visit the Oil Size Center.


Using Ribbon Leaf

Also known as 'rolls of leaf'

When working on large surface areas it is recommended that you use Ribbon Leaf. This is available in a variety of leaf types, including Imitation Gold, Imitation Silver, Copper and Genuine Gold ribbon leaf. Each roll comes as a continuous roll of individual leaves laid back-to-back with a 2mm overlap. It ideal for large, flat areas, making straight and long runs easily manageable.

Watch a short video explaining the different types of packaging for metal and genuine leaf - Loose Leaf - Patent Leaf - Ribbon Leaf.


Applying the Ribbon Leaf

Carefully apply a strip of leaf, working with one long strip, from end to end, or in smaller segments, depending on your surface area. It helps to work with 2 people, one holding the paper while the other carefully places the leaf in place. After applying the leaf to the 'sized' surface, use a soft 'Squirrel mop' gilder's brush and rub over the paper backing to insure all the leaf is attached to the surface.

You can gently rub the paper backing with your fingers, BUT you must be careful not to allow the paper backing to move or scratch the leaf surface. Gently remove the paper from the leaf, using your 'Squirrel mop' gilder's brush. Make sure there are no air bubbles and the leaf is firmly attached to the working surface. Peel the paper backing off slowly and carefully. Retain any excess pieces for touch ups.


Touching up Holidays

A holiday is the term used to refer to missed or void areas in the leafed surface. This can happen because an area was missed during the adhesive size application. Or a leafed area was not pressed firmly to the adhesive and the adhesive has dried, causing the leaf in that area to fall away when burnishing.

While your adhesive size is still tacky, carefully scan your gilded surface for 'Holidays', or gaps and missing areas, where there is need for more leaf. Just re-use exisiting leaf from your appplication stage. Apply as need to areas requiring touch ups. If you find an area that was missed in the size application and the leaf simply won't stick, then you have a 'Holiday'. These areas will require additional adhesive.

It can be tricky to try and patch in dry spots with fresh size. And areas that have two layers of leaf can 'flash', appearing brighter in the final finish. The type of material and adhesive you use may require different approaches. Contact us if you have a specific requirement and need further asssitance with touch-ups and Holiday repairs.


Finishing Off

'Finish Off' or Burnish' the surface to remove and excess leaf, known as skewings.

A soft hair Squirrel mop brush is recommended to remove excess leaf and 'polish' the surface. Insure that there is full leaf coverage on your surface before cleaning with your mop brush. Once all the 'holidays' or gaps are filled with leaf, use the mop brush to dust off any excess leaf.

Be fairly comprehensve but leave a small amount of leaf dust. In otherwords, don't give an aggressive 'polish' directly after applying the leaf. The adhesive is still soft and your leaf may dull if you over work the brush. Allow to set up over night then come back and complete the final 'burnishing' the next day. You can complete this process by using your Mop brush and soft cotton, to remove any excess leaf pieces and create the finished, burnished leaf appearance.


Sealing the leafed surface

Apply solvent-based varnish, such as 'Acrylic Topcoat Sealer', using a short nap roller. While this is still wet, soften with a high quality brush. 'Acrylic Topcoat' is a non-reactive, non-yellowing, premium clear sealer for genuine and metal leaf. Made from acrylic copolymers, Acrylic Topcoat provides protection from abrasion, water and ultra violet light. Even out the varnish using a high quality brush. Brush in a criss-cross pattern to smooth surface evenly.


parchment paint effect

Pre-mixed Glazes

Ready, set, GO!

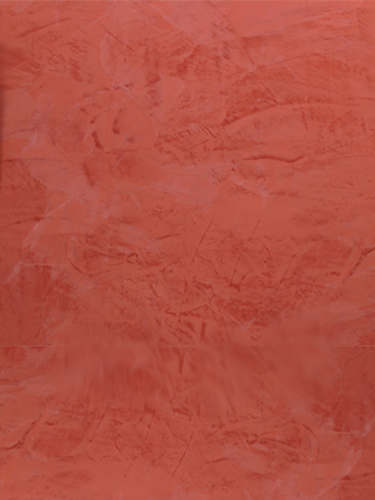
Getting going with these premixed glazes. Select one of our pre-mixed glaze colors or create your own. We custom mix any color from all major paint manufacturers. Just pick your own color from any swatch book and let us know the paint name and number and we'll send you the right glaze - interior or exterior - custom matched to your liking.

Create classic effects such as colorwashing, dragging, striee, antiquing effects, furniture effects and much more!

Buy Now!

premixed color glaze for faux finishing


Featured Product Ideally suited for exterior applications.

Gold Leaf Kits - Oil based

Professional Gilding Kit - 23kt Gold Leaf. Each kit contains: Basic step-by-step instructions, one book 23kt Gold Leaf book (Patent leaf) one 4 oz. bottle of yellow/ochre oil based Gilding Primer, natural hair brush, one 4 oz jar of oil based gilding size, one 4 oz Acrylic Top Coat Sealer, cotton and mixing sticks, wet/dry paper and book of leaf. Solvent-based. Each Gold leaf book contains 25 leaves. Each leaf is 3 3/8" x 3 3/8" square. Approx coverage is 1.7 sqft.

UPS Ground shipment only.

Learn more and purchase sealers for gold leaf now.

BUY NOW

Featured Style

Adam Style design and architecture

Adam Style

Adam style is named for Robert Adam, the most famous architect of the British eighteenth century, who revolutionized Neoclassical design and created a style remarkable for its freshness, fluidity, and grace.

Adam, born in 1728, traveled Europe as a young man, studying the architecture of Roman antiquity. When he returned to England, ready to reinterpret classical principles for a modern audience, he set up an architecture firm with his brother James.

The Adams’ work became enormously influential in England and America, where it was known as Federal style and remained the dominant mode in domestic architecture from the 1790s to the 1830s.

more...


Related Features