Gilding with Water Based Adhesive Size          

How to apply Imitation Gold Leaf

Water based method - Using water based adhesive size

Aqua Size and Wunda Size are popular water based sizes and serve as an alternative to oil size for interior projects. Both have an extremely long tack time making it suitable for large scale interior projects or production gilding in manufacturing plants. Aqua Size and Wunda Size are most appropriate when used to gild with metal leaf, but will produce acceptable results with genuine gold. Porous surfaces should be sealed with a primer prior to sizing. Aqua and Wunda Size are for interior use only. Clean up as soon as possible with water or acetone.

About Water based adhesive size

Size refers to the adhesive material used to adhere gold, silver, copper or metal leaf to the surface being gilded. There are different forms of size depending on the gilding method; oil based, water based and 'water gilding'. Gilding with water based adhesives should not be confused with Traditional Water Gilding methods or the Kolner Water Gilding System. Water based adhesives form a tacky surface needed for the leaf to attatch to the surface and are not burnishable.

how to apply imitation gold to objects

priming object before gold leafing

Step 1: Prepare work area.

Cover working surfaces and floor areas with drop cloths or newspaper. Use low-tack painters tape to mask any areas not to be gilded. Lightly sand the surface if necessary with 220 grit sandpaper to remove any blemishes.

Step 2: Prime surface.

When Gilding on objects or furniture, insure that the item is sufficiently primed with a water based primer. A can of spray primer provides the quickest solution for treating ornate items with hard to reach crevasses


applying base color for gold leaf

Step 3: Apply base color,

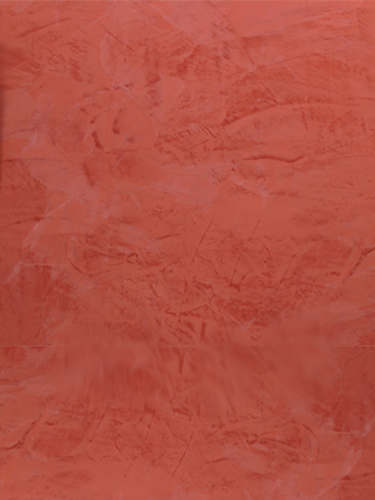
Also referred to as 'bole'. Once the primer is fully dry, you are ready to apply the base color for your leaf. For an 'old world' look, a rich earthy red color is used as a ground for both genuine and imitation gold leaf. For a comprehensive gilt appearance a yellow/ochre color is used. Select this base color tone carefully as you’ll be able to see some of this undercolor showing through on the finished gilt object. Use a brush or spray on this undercolr while paying attention to recesses and hard to reach places.

Change it up! You can experiment with different colors and your choice will affect the overall appearance of the finished product. Visit the Bole information center for more color ideas.


applying base color for gold leaf

Step 4: Apply adhesive 'size'

Size refers to the adhesive used to bond the leaf to a surface. A water-based gilding size is suitable for interior projects only. Apply the size with a brush, working the size carefully, spreading it to an even film. Special attention should be used when working with objects that have deep recesses, insuring complete coverage of the size in these areas.

To learn more about water based adhesive size please visit our water based size product page.


About Bole

This base color is also referred to as the 'Bole' color. Traditionally, bole was made from clay. Today paint is typically substituted. One can experiment with different colors and your choice will affect the overall appearance of the finished product. For example, the traditional terra-cotta color adds warmth to both gold and silver leaf. A black 'bole' color creates a hard, cold look - often appropriate for Neoclassical, Art Deco pieces, and the like. A yellow 'bole' color evens out the overall appearance, and diminishes any 'holidays' or cracks on the gilded surface.

You can learn more about true clay bole here.


Featured Product Ideally suited for interior applications.

Gold Leaf Kits - Water based

Basic Gilding Kit - Color 2.5 - Includes all the tools and materials to apply Imitation Gold Leaf. Basic Kit contains: Basic step-by-setp instructions, one book of Imitation Gold leaf (loose leaf), one 4 oz. bottle of Aquasize (waterbased adhesive size), natural hair brush, cotton and mixing sticks, wet/dry paper. Clear Coat Sealer sold separately. Water-based. Each book contains 25 leaves. Each leaf is 5.5" x 5.5" square. Approx coverage is 5 sq. ft.

BUY NOW


Testing your Tack

Step 5: Testing your 'tack'.

Water based adhesive come to tack in approx. 20 mins and stay 'open' for up to 30 hours, allowing for a long open window to apply your gold leaf.

Note Water based adhesive size sets up quickly and do not self-level. Therefore, you may experience brush strokes or roller marks drying in your adhesive and subsequently appearing in your finished gilt surface. For a smoother finish, consider using an oil based adhesive size, which self levels.


how to apply gold leaf

Step 6: Applying Gold Leaf:

Surface leaf: Placing a book of leaf in your hand, carefully fold back the protective paper to expose the imitation gold leaf. Lay the leaf onto the sized area and 'roll' out the leaf. Hold firmly and carefully. Attach leaf to surface.

Patent Leaf: Carefully remove a single sheet of imitation gold leaf transfer paper and gently apply to your surface. Rub over the back of the paper with a gilder's brush, or gently with your fingers. Carefully remove the paper to leave the imitation gold leaf adhered to the surface. Continue in this manner.


how to apply gold leaf

Step 7: 'Burnishing' or 'finishing off' the leaf

When using water based size, burnishing refers to the cleaning of the excess gold bits (Skewings) with a soft brush. Do not use an agate stone burnisher. Actual burnishing tools can only be used with Traditional Water Gilding Techniques. Learn more about Traditional Water Gilding here. Once leafing application is completed, remove all the extra, loose bits, known as ‘skewings’. Using the soft ¾ inch gilder’s brush, brush the surface removing any loose leaf flakes. Cotton balls may also be used. Do not use regular painter’s brushes, such as bristle or synthetic fibers, because they will scratch the leaf and dull the luster of the gold finish.


how to apply gold leaf

Step 8: Touching up 'holidays'

Touch up any 'holidays', areas that are missing leaf due to lack of sufficient sizing or from leafed areas that may have torn away during burnishing. For details on this procedure visit the artSparx advanced gilding tutorials at the artSparx Gilded Corner.

how to apply gold leaf

how to apply clear sealer to gold leaf

Step 9: Seal and protect the gilded surface. Imitation Gold Leaf will tarnish and therefore requires a clear coat sealer after application. This protective coat of sealer not only prevents oxidation is also insures durability of the leaf, particularly in high traffic areas or for heavy use objects and furniture.

Water based sealers Hydrocote Polyshield Clear topcoat is a water based non-yellowing polyurethane sealer. This sealer is water clear with exceptional clarity. It dries quickly to a hard durable finish. It is resistant to water and marring when fully cured. Polyshield is UV stable which keeps it from yellowing over time.

Solvent based Acrylic Top Coat Specially formulate for use over genuine or metal leaf surfaces, the 'Acrylic Topcoat' is a non-reactive, premium water clear sealer for genuine and metal leaf. Made from acrylic copolymers, Acrylic Topcoat provides protection from abrasion, water and ultra violet light. This solvent based sealer resists chemicals and may be applied by brush or spray. Available in Gloss and Satin finishes. More information.


how to apply clear sealer to gold leaf
Step 10: Apply antique glaze

OPTIONAL Antiquing and aging your leafed surface adds character and old world charm. For antiquing recipes for gilded surfaces visit the Antiquing Center.


Oil Gilding Video Tutorial

Quick Dry oil size gilding. This detailed demonstration shows you how to apply genuine gold, Silver, imitation gold, aluminum and copper leaf to objects and furniture using the classic 3 hour oil size method. Brought to you by the folks at gildedplanet.com, you'll learn about types of adhesive, testing for 'tack' and drying rates, easy leaf application tips and cleaning and burnishing the leaf.


parchment paint effect

Pre-mixed Glazes

Ready, set, GO!

Getting going with these premixed glazes. Select one of our pre-mixed glaze colors or create your own. We custom mix any color from all major paint manufacturers. Just pick your own color from any swatch book and let us know the paint name and number and we'll send you the right glaze - interior or exterior - custom matched to your liking.

Create classic effects such as colorwashing, dragging, striee, antiquing effects, furniture effects and much more!

Buy Now!

premixed color glaze for faux finishing


Featured Style

Adam Style design and architecture

Adam Style

Adam style is named for Robert Adam, the most famous architect of the British eighteenth century, who revolutionized Neoclassical design and created a style remarkable for its freshness, fluidity, and grace.

Adam, born in 1728, traveled Europe as a young man, studying the architecture of Roman antiquity. When he returned to England, ready to reinterpret classical principles for a modern audience, he set up an architecture firm with his brother James.

The Adams’ work became enormously influential in England and America, where it was known as Federal style and remained the dominant mode in domestic architecture from the 1790s to the 1830s.

more...


Related Features