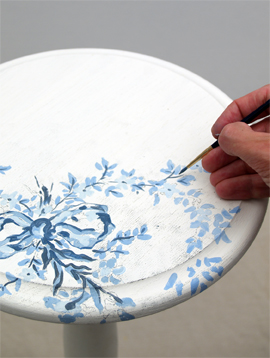
Sponging
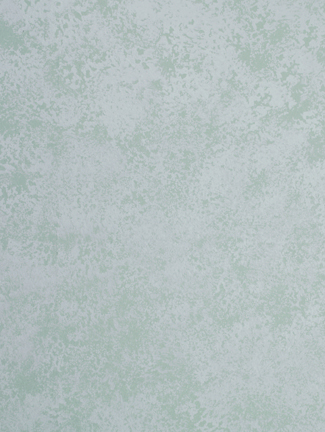
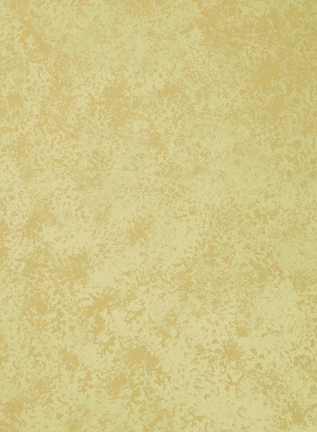
Everyday materials are often used to great advantage. Sponging utilizes a simple sea sponge to create a variety of visually textured effects. A tone on tone sponge finish, as demonstrated here, might imply the feeling of dappled light bouncing off a wall, while using contrasting colors can create a bold, striking effect. This painted effect is great for its ease of mastery, quickness of application and trouble-free clean up. It is also an easy finish to maintain over time. By blotting on fresh color over scuffmarks and damaged areas, the finish is easily refreshed, making it excellent for residences with young children and mischievous pets.
Special Feature
Venetian Plaster
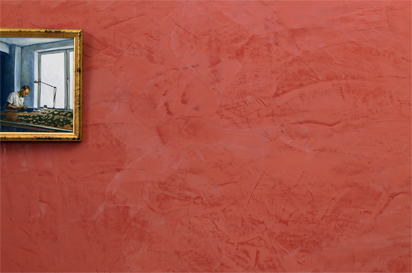
Polished Plaster, or Stucco Veneziano, is a Traditional wall treatment that provides a glossy, visually textured wall finish. Venetian Plaster is a natural formula composed of organic ingredients, calcium, and acrylic binders creating a decorative paste plaster for interior applications. Polishing the surface compresses the calcium within the compound, creating a narble-like finish, cool and hard to the touch.
This treatment is quite versitile, ranging from a rustic backdrop to a refined and elegant finish.
Color Palette
TIPS
Blot with newspaper. It's helpful to blot the spong on clean newspaperbefore applying it tom the wall. This will remove paint buildup, helping ensure a nice, open spong pattern.
Use a light touch. When sponging a surface, the spottiness created by the sponge is desirable. Keep a light touch during application.
Reuse sponge. Sponges may be rinsed clean. If you are unable to complete the sponged effect in one sitting, rinse and store the sponge in a resealable plastic freezer bag to retain freshness for reuse. Record the paint color numbers for future referebnce in the event touch-ups are needed.
Base color – Plymouth Rose

Sponging color – White Coral

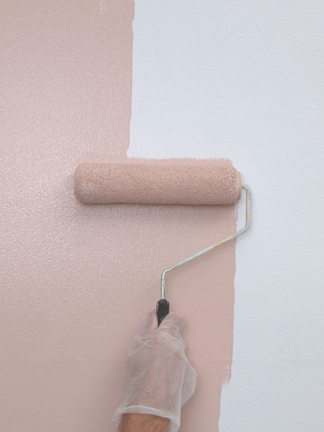
Step 1: Basecoat
Paint the base color, Plymouth Pink (or your own color choice), on the wall surfaces. Let dry for 4-6 hours.
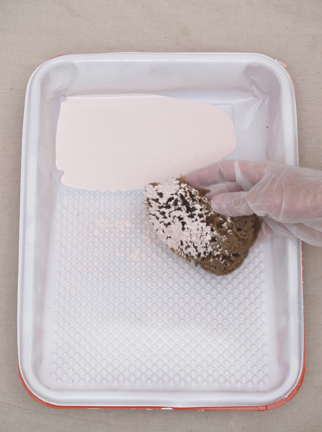
Step 2: Set up for sponging
Pour some of your second sponging color (latex paint) into a clean, disposable paint tray. Load the sponge by lightly dipping it in the paint. It is important not to overload the sponge. By leaving many of the pours and holes of the sponge surface free of paint you can utilize the textured surface to create the appearance of a speckled and mottled wall.
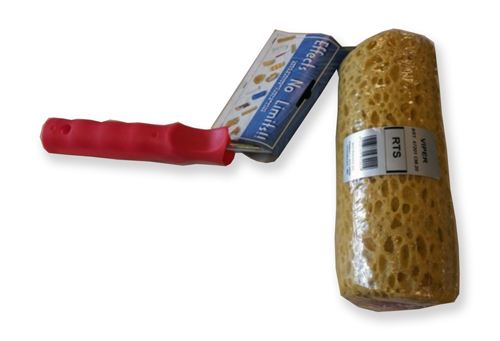
Sponge Roller
Viper Skin Sponge Effect Roller -7.8 in
Create a variety of sponge effects with this great sponge roller tool. Experiment with multi-colored patterns. Create linear sponge effects or random patterns., This easy to use tool puts creativity in your hands. Increases efficiency and quick clean up. Use oiver and over again.
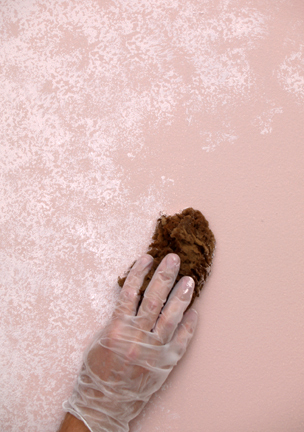
Step 3: Dab on paint with sponge.
With the loaded sponge in hand, use gentle pressure to dab paint onto the surface in a random manner, twisting your hand to vary the sponge texture. Evenly work over the wall or surface being treated, allowing the base color to show through. Let dry.
Step 5:
Optional: Additional sponge colors.
You may choose to introduce an additional color tone to the room. After the first sponge color has been applied over the entire wall surface, apply color 2 with second sponge in same manner. This time pay more attention to ‘bald’ spots or uneven areas. Work consistently, stepping back occasionally to get a general feeling of the look that you are creating on the whole wall surface.
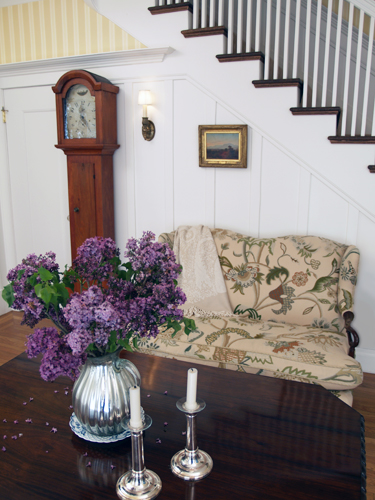
Early American Style
Colonial Amercians drew inspriation from their European heritage. Curent design styles would filter across the ocean and become reinventedin early America. Proportion and scale took reign over ornementation, A neutral color palette of grey blue, greens and rose pinks is readily apparent.
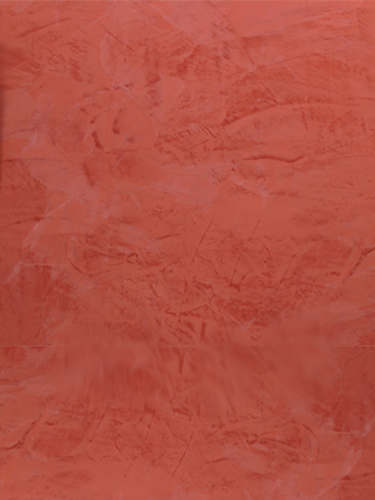
Venetian Plaster
Polished Plaster, or Stucco Veneziano, is a Traditional wall treatment that provides a glossy, visually textured wall finish. Venetian Plaster is a natural formula composed of organic ingredients, calcium, and acrylic binders creating a decorative paste plaster for interior applications. Polishing the surface compresses the calcium within the compound, creating a narble-like finish, cool and hard to the touch.
This treatment is quite versitile, ranging from a rustic backdrop to a refined and elegant finish.
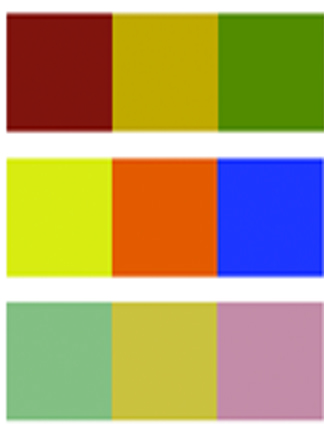
The Rustic Color Palette
The Rustic Style color palette falls within a distinct range of color tones and is essential in creating a successful Rustic interior. By using the appropriate color tones you can create a variety of design styles ranging from Period and Historic, regional or thematic. Color helps define our experiences within an interior and exterior environment. It affects us on a physical, emotional, and spiritual level and can be calming and passive, expressive and vital.
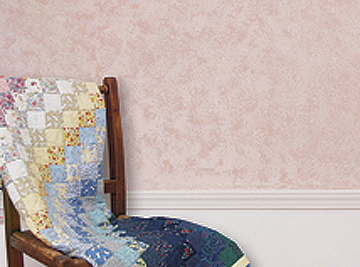
Painted Floral Details
Floral patterns used as accents in fabrics and furniture are common place details in the English Country home. These graceful and organic patterns complement the cozy interior of this style and work particularly well with lace window treatments, an heirloom tea service set and the natural and rustic charm of wooden ceiling beams and slightly irregularly textured walls.