How to paint flowers on furniture. It's easy! - artSparx.com        

Painted Floral Details

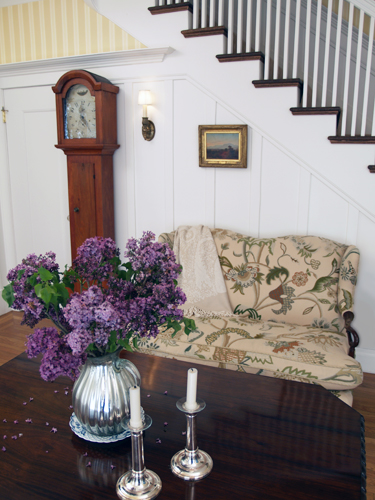
Floral patterns used as accents in fabrics and furniture are common place details in the English Country home. These graceful and organic patterns complement the cozy interior of this style and work particularly well with lace window treatments, an heirloom tea service set and the natural and rustic charm of wooden ceiling beams and slightly textured walls.  

Antique Glazes and Aged Finishes
Antique paint glaze

Antique Glaze Create the perfect antique finish. Furniture, objects, paintings, wall and ceilings. Our exclusive line of custom antique glazes are idealy suited for interior and exterior applications. This acrylic based medium is eco-safe, easy application and clean up, with enhanced color saturation. Great for all weather conditions. Pre-mixed colors for historic application, thematic and geographic design styles.

more


Tip

Find patterns in wallpaper

I've chosen the floral motif for this demonstration from an antique wallpaper pattern. You can use different patterns to meet your interior needs. Patterns from wallpaer selections work especially well, as they tend to be rendered in an illustrated manner that facilitates an easy tracing withn tracing or transfer paper. Often there is no shading involved, with depth being created by a tone-over-tone pattern. Wrapping the image over edges and sides help impart an organic, playful style.

Download the floral pattern for this tutorial. You may need to re-scale the image to fit your object or furniture.

Color palette Earth Tones


painted floral pattern

Step 1: Prime and Sand

Prime the table with a water based acrylic primer and allow to dry. Sand the entire table with 220 grit sandpaper, sanding in the direction of the grain.


painted floral pattern

Step 2: Basecoat

Brush on the base color, Antique White. Allow to dry for 4 hours.


parchment paint effect

Pre-mixed Glazes

Ready, set, GO!

Getting going with these premixed glazes. Select one of our pre-mixed glaze colors or create your own. We custom mix any color from all major paint manufacturers. Just pick your own color from any swatch book and let us know the paint name and number and we'll send you the right glaze - interior or exterior - custom matched to your liking.

Create classic effects such as colorwashing, dragging, striee, antiquing effects, furniture effects and much more!

Buy Now!

premixed color glaze for faux finishing


painted floral pattern

Step 3: Illustrate your pattern

Create the floral template by outlining the floral pattern on the wallpaper or pattern you've selected using a fine tip Sharpie pen and tracing paper.


painted floral pattern

Step 4: Transfer the pattern.

Transfer the pattern onto your surface using transfer paper.

You can purchase graphite transfer paper, available in a variety of colors. Starting with an original pattern, transfer the image onto the working surface using a singkle sheet of transfer paper. By laying the transfer paper over the working area, groaphite surface down, you can then place the pattern on top and outline the pattern. This leaves an exact copy on the working surface, ensuring that the proper scale and proportions are met.

Making your own transfer paper.

You can also make your own. Using a piece of tracing paper, take a soft pencil (6B or 8B lead) and rub over one side of the tracing paper. This will be your transfer paper. It's that easy!


vpainted floral pattern

Step 5: Create color mixture.

Place the 4 artist acrylic colors listed in the materials bar to your left on a paper palette and mix a medium blue tone by combining Titanium White, Ultramarine and a hint of Raw Sienna (this is Color Mix A).


painted floral pattern

Step 6: Painting Leaves

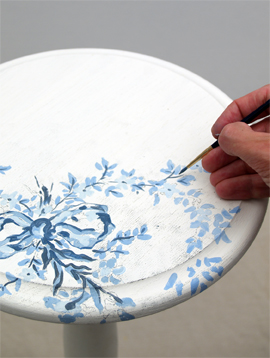
Using the No. 1 brush, paint in the leaf forms and medium toned areas of the ribbon with Color Mix A. Let dry.

Step 7: Paint flowers

Add the secondary color by mixing additional Titanium White to ‘Color Mix A’, creating a pale blue. Continue using the No. 1 brush and paint the flower forms and the lightest detail on the ribbon. Let dry


painted floral pattern

Step 8: Add dark details

The third and final color is mixed to a dark blue by blending Ultramarine Blue, Raw Umber and a hint of Raw Sienna together. I use this color for the branches and darkest areas on the ribbon. Let dry.


painted floral pattern

Step 9: Paint remaining surfaces

I continue the same procedure along the base and pedestal of the table, randomly applying your leaf and flower forms in a gentle spiral from bottom to top.


painted floral pattern

Step 10: Distressing the surface

Once the surface is dry, remove any remaining pencil lines with a kneaded eraser, and then wipe the residue off with a clean rag. Lightly sand the top and base with 220 grit sandpaper, focusing on the edges of the table and working to bare wood occasionally.  To increase the distressed effect, randomly sand off the painted image to reveal the white under color. This process is known as ‘physical distressing’.


Hydrocote waterbased sealer and top coat

Hydrocote Polysheild Clear topcoat - Gloss or Satin

Water Based

In Stock

Hydrocote Topcoat. Polyshield Clear topcoat is a water based non-yellowing polyurethane sealer. This sealer is water clear with exceptional clarity. It dries quickly to a hard durable finish. It is resistant to water and marring when fully cured. Polyshield is UV stable which keeps it from yellowing over time.

Hydrocote Polyshield is available in gloss and satin. It is non-flammable, non-toxic and environmentally safe.

Buy Now!


painted floral patternr

Step 11: Antique wash

Mix Raw Umner and Raw Sienna together (5:2). Thin the mixture with water and apply over the entire surface.

For more on how to Antique objects and furniture visit our Antiquing Center


painted floral pattern

Step 12: Soften antique wash

Complete the process by softening and blotting the wet antique color mix with an clean rag. Once this is dry, apply a clear satin or low-luster water based sealer


Related Features