Antique Lacquer Paint finish
How to create an antique lacquer paint finish on furniture and objects.
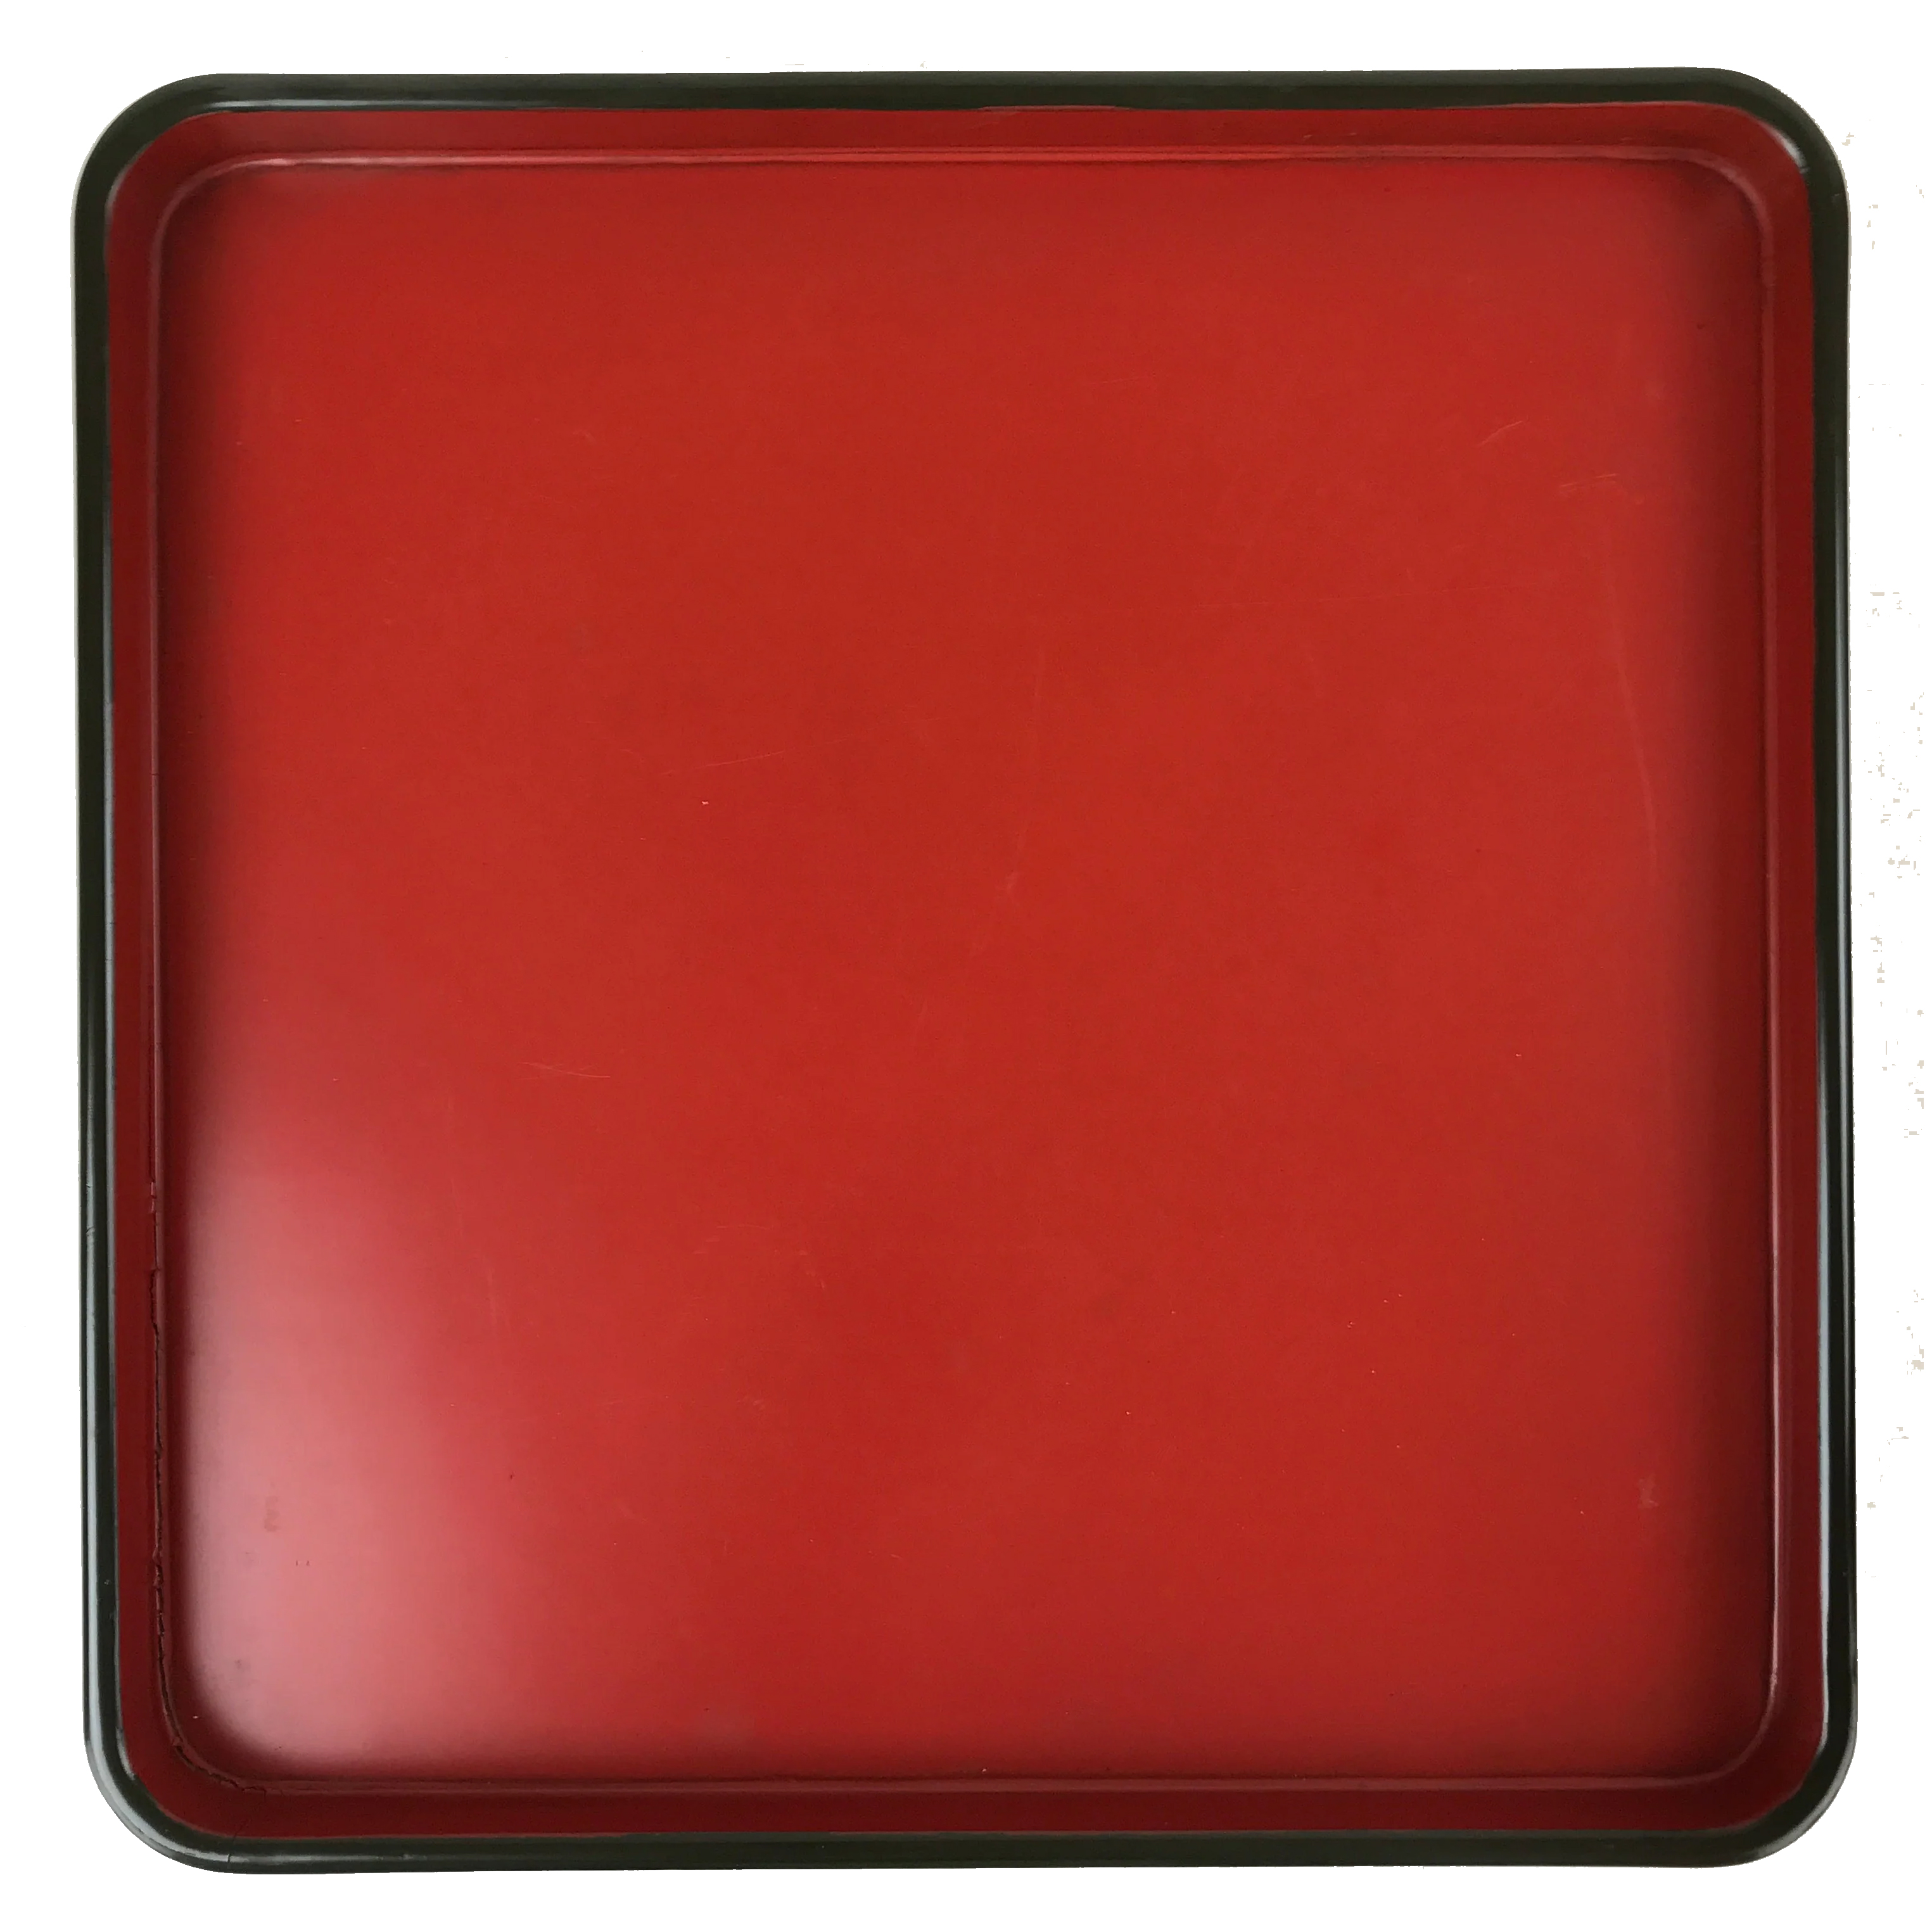
Red lacquer paint - high gloss hand rubbed finish
Transform simple furniture, or elaborately carved ornament into a beautiful keep sake with this antique red lacquer paint finish. Learn how to create an antique lacquer paint finish on furniture and objects easily.
Images of oriental cabinets, chinoissiere chests and screens, hand rubbed objects from far away places stir the imagination. This simulated polished red lacquer effect is perfect for creating a wonderful Asian influence in any environment. Transform simple furniture, or elaborately carved ornament into a beautiful keep sake. Great for kitchen cabinets and wood furniture.
Preparing the surface
You can use this decorative technique on any type of furniture or object.
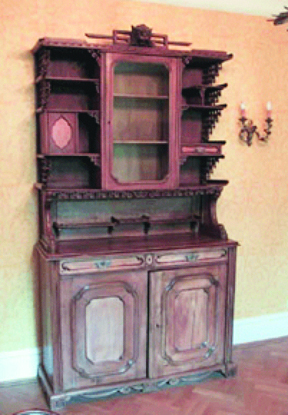
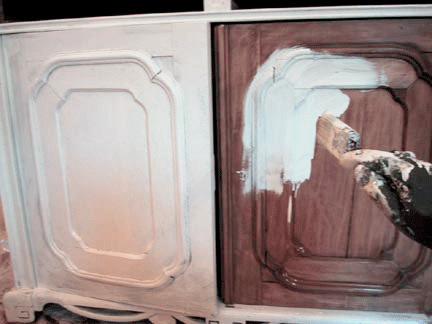
We've chosen this oriental cabinet to create our finish. You can use new, un-finished furniture, an old antique, or even a painted object. Following we describe how to refinish furniture with an existing finish.
Step 1:
Remove all nails and repair any damaged or cracked areas. Place protective drop cloths around object or furniture, and tape any areas not meant to be painted or refinished. Refer to the artSparx basic preparation resource for tips and techniques.
Step 2:
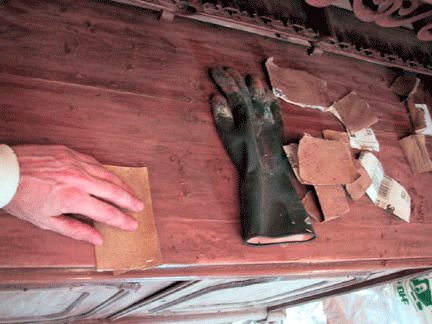
The surface may need to be stripped, but in most cases you can dull the existing surface with a light sand. Use 180 grit or 220 grit sandpaper, always sanding in the direction of the wood grain.
Step 3:
Priming and undercoating
When you have completed your sanding, remove all dust with a tack cloth. Next you will need to prime the surface with a good quality primer. A fast drying oil-based primer is recommended. An oil based finish will create a durable finish.
Because the 'lacquer' glaze, as described below, is an oil-based product, it is recommended that you use an oil-based primer, followed by an oil-based base color. Using a brush with natural bristles will work well. Water-based paint will work, but will not be as durable and the final luster may be slightly affected.
Priming the cabinet with a high quality, white primer.
Step 4:
Choosing the base color
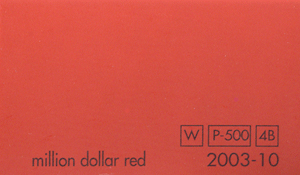
A rich red is used for the base color on our simulated Chinese lacquer surface. Other colors, such as Ochre and Sage green, are also used, though less frequently. Following are two additional color options. The following glazing technique will be the same for any color you choose.
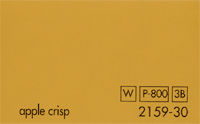
Golden Ochre implies a rich, golden inner glow.
Using alternate base colors
Other colors, such as Ochre and Sage green, are also used, though less frequently. Following are two additional color options. The following glazing technique will be the same for any color you choose.

Stem green creates a lovely softness in your lacquer appearance. Ideal for small and unusually shaped objects
Step 5:
Applying the base color
After you have stripped and primed your furniture or object, and allowed the primer to completely dry, you are ready to apply your base color.
Step 6:
Paint the surface using a good quality painter's brush. A 3 inch brush should work well for most surfaces. For large, straight areas, use a mini roller where ever possible. This will insure a smoother, flatter painted surface.
Step 7:
Creating your 'Black lacquer glaze'
You will now proceed with the 'black lacquer' treatment for your simulated lacquer effect. The effect you will be applying is essentially a soften variation of the classic striee treatment, only you will leave the edges more opaque and the center panels softer and more 'transparent'. In this manner you will achieve the hand-rubbed, hand polished effect of time worn lacquer, buffed and polished over centuries of care - and wear and tear.
Create your 'lacquer' glaze in the following manner. First, put on your disposable gloves. In a 2.5 quart bucket, mix 1 to 1 1/2 tubes of black Universal Tinter with 1/2 tube Raw Umber Universal Tinter into 1 quart of satin or semi-gloss oil based varnish. Stir thoroughly. You can always add more tinter if the glaze is not opaque enough. Add approx. 1/4 cup mineral spirits (white spirits) to the glaze solution and mix completely.
As you begin to apply the black 'lacquer' glaze, the colored varnish will settle in your bucket, being heavier than the mineral spirits. It will be necessary to continually stir the solution to maintain its fluidity. It may also be necessary to add small amounts of mineral spirits to your glaze as you work through your project. This will compensate for any evaporation and settling of the glaze mixture.
Step 8:
Applying your lacquer glaze
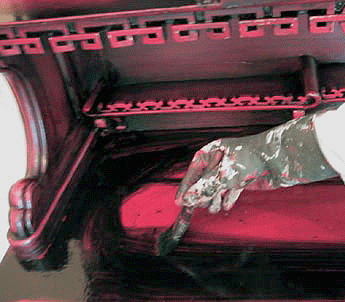
Begin glazing from the inside surface outward. Therefore, any back panels will be first, then side panels, etc. Working in one area at a time, you will start by taking a rag moistened with mineral spirits and wet the panel you are working on. This helps move the glaze fluidly over the surface. Now apply your glaze from the outside of the working area towards the center, but leave the center panel blank.
Use a clean rag and carefully 'pull' glaze color from the outer edges into the center panel. The technique is to create a 'halo' effect, with a soft, lightly glazed center panel, gradating outward to near black on the outer edges.
While still wet, use a clean, dry brush and lightly brush over the surface, called 'feathering', to soften the glaze and create an even, blended appearance. You can brush in all directions at first. When you are pleased with your results, finish off with light, even brush motions from one edge - completely stroking through - to the other edge. Continue this even brush movement over the entire surface you are currently glazing.
The completed, softened glaze effect glows with an apparent 'halo' of blackness surrounding a sumptuous, deep red tone.
Step 9:
Glazing a door with inset panel
Always start with the inner most area first, then move outward. In this case we will start with the center panel of the doors. Following is a diagram for the method of approach for glazing doors.
A: Begin with center panel #1.
B: Continue to center panel moldings #2, always dragging in a horizontal or vertical manner.
C: Drag top and bottom panel #3 in a horizontal manner.
D: Use a damp rag and wipe clean a straight line between panel 3 and 4. This mimics the grain pattern of how the door is put together.
E: Glaze left and right panel 4, carefully dragging against clean line created in step D with your dry brush.
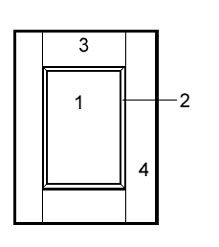
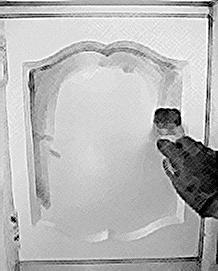
Illustration 1: Apply glaze to edges of panel
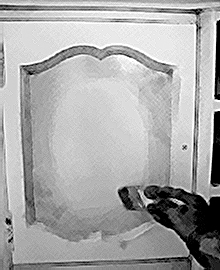
Illustration 2: Soften lightly and begin to bring glaze into the center, pulling glaze inward.
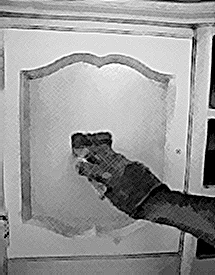
Illustration 3: Now soften evenly

Illustration 4: Begin outer panel
Step 10:
Again, start by taking a rag moistened with mineral spirits and wet the panel we are working on. This helps move the glaze fluidly over the surface. To create the antique effect we start by applying our glaze in a 'halo' manner, keeping the center of the panel free of glaze.
Step 11:
Once you have created a halo with your glaze use a dry brush and begin to pull color into the center panel. You want to keep the edges a stronger tone than the center. Drag glaze in straight, even motions from top to bottom until the center has a slight 'veil' of color. Once you have completed this move to the outer panels. Apply your glaze and with your dry brush, drag the glaze in an even manner to soften the panels as mentioned above.
Step 12:
Repeat this process on the side panels and frame of the cabinet.
Step 13:
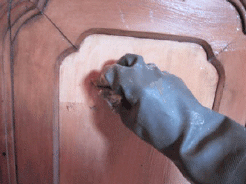
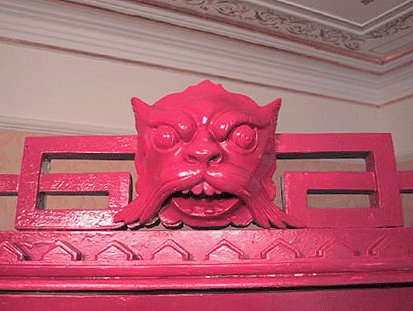
Accenting your lacquered object
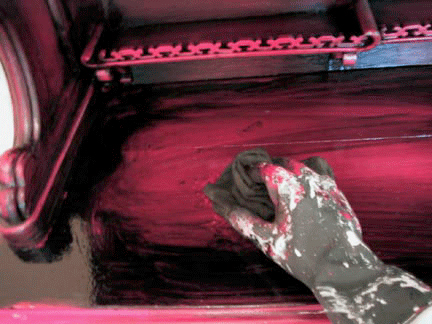
If your lacquered object or furniture has any interesting details - high points, relief moldings, rounded edges - you can accentuate them and build character into your Chinese lacquer piece. First glaze the section completely with the black lacquer glaze, softening with a brush as mentioned above. Next, use a clean rag and gently wipe the high points, and edges, removing some of the glaze and revealing the base color underneath. Soften lightly with your brush to even the 'buffed' surfaces out. You will immediately see amazing results! Do this where ever you feel there might be a need for a 'glowing' accent or edge.
Allow your object or furniture to completely dry, approx. 24 hours.
Step 14:
Optional 2nd glazing treatment
If you would like your newly lacquered piece to be darker, particularly on the edges, you can apply a second glaze treatment, exactly as before. You will not need to be as conscientious, however, as the initial treatment will have covered the base color completely.
Applying a second coat of glaze, though not necessary, will create a richer, deeper appearance, and will make the lacquered object even more magical and authentic looking.
Step 15:
Applying a protective varnish coat
To add additional protection to your object or furniture, an oil-based varnish, preferably the same brand as you used for your 'lacquer' glaze, may be applied after the painted surfaces have dried completely (24 hrs). A low luster or satin finish will work well.
Optional:
Applying a wax protective coat instead of varnish
Instead of applying an oil-based varnish, you may choose to coat the surface with a tinted wax. This will create a hand-rubbed finish and will provide sufficient protection to your object. A tinted wax, such as Bree Wax, will work perfectly.
Step 16:
Clean up with mineral spirits.
Step 17:
Dispose of rags properly.
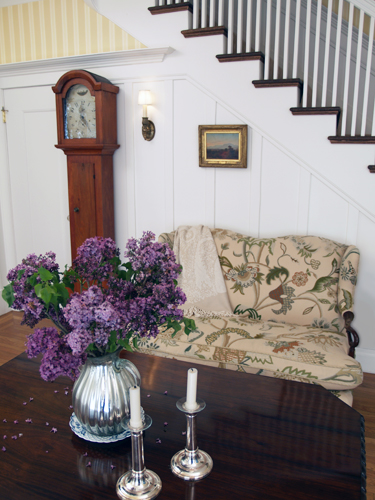
Early American Style
Colonial Amercians drew inspriation from their European heritage. Curent design styles would filter across the ocean and become reinventedin early America. Proportion and scale took reign over ornementation, A neutral color palette of grey blue, greens and rose pinks is readily apparent.

Venetian Plaster
Polished Plaster, or Stucco Veneziano, is a Traditional wall treatment that provides a glossy, visually textured wall finish. Venetian Plaster is a natural formula composed of organic ingredients, calcium, and acrylic binders creating a decorative paste plaster for interior applications. Polishing the surface compresses the calcium within the compound, creating a narble-like finish, cool and hard to the touch.
This treatment is quite versitile, ranging from a rustic backdrop to a refined and elegant finish.

The Rustic Color Palette
The Rustic Style color palette falls within a distinct range of color tones and is essential in creating a successful Rustic interior. By using the appropriate color tones you can create a variety of design styles ranging from Period and Historic, regional or thematic. Color helps define our experiences within an interior and exterior environment. It affects us on a physical, emotional, and spiritual level and can be calming and passive, expressive and vital.
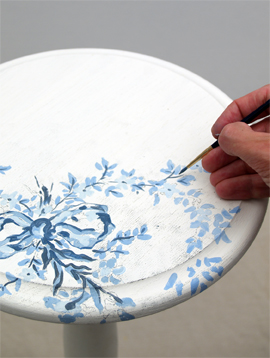
Painted Floral Details
Floral patterns used as accents in fabrics and furniture are common place details in the English Country home. These graceful and organic patterns complement the cozy interior of this style and work particularly well with lace window treatments, an heirloom tea service set and the natural and rustic charm of wooden ceiling beams and slightly irregularly textured walls.