Antique Plaster Wall Finish
Lesson 2 - Simulated Fresco Effect Series. Step-by-step tutorial.
Create old world charm or contemporary sophistication with these easy to follow plaster effects and simulated Fresco techniques.
Step by step antique and aged plaster wall finishes you can create yourself. Great for homes, restaurants and commercial spaces. Highest quality plaster materials from US and Italy and easy to use step by step application tutorials help you master this traditional finish easily. 1000's of color options available.
Simple Plaster Finish - Lesson 2 - Antique Plaster Fresco Effect
artSparx has created a 3 stage step-by-step tutorial series. Lesson 1 begins with basic plaster application. Lesson 2 illustrates antique glazing and plaster distressing methods. The series culminates in the final fresco simulation Lesson 3, hand-painted details. You can complete each tutorial as a finish and style in it's own right. Or, depending on your interests and style needs, combine the tutorials to achieve the hand-painted fresco appearance that will bring your environment to life.
Series 1 - Basic Plaster Application
Series 2 - Antique glazing and distressing
Series 3 - Hand-painted Details
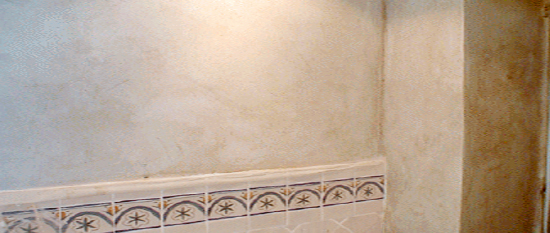
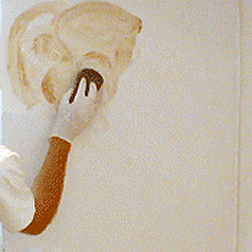
Unfinished plaster wall. Before antique glaze application.
You may remember from Lesson 1...
In Lesson 1 of this 3 part series we learned how to properly prepare our working surface. Material review and creating our basic plaster compound. The application process takes us through the steps of applying, smooting out and creating a light textured wall finish.
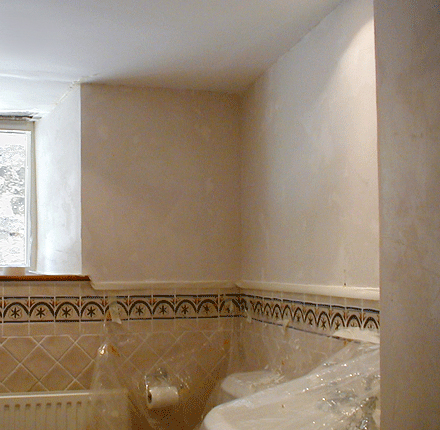
In this lesson we'll move to the next phase and create and aged, mottled appearance of time worn walls. This happens by apply a glaze over the finished, dry plaster surface.
A glaze can be any pigemnted solution that is thinned out and washed over a surface to create a additional toned appearance. This can be made with water based or oil based products and, based on how thin the pigmented solution is, can be applied to virtually any surface. Whether fine art paintings, furniture and objects, gold leaf and plaster finishes, to name a few.
Blending Traditional and Contemporary Design
Inspired by the ornate plaster-work of Renaissance Italy, decorative plaster has a millennial history, with origins dating back to the Rome of the Caesars and in the art of Ancient Greece.
It was Andrea Palladio, a famous Italian architect, who in the XVI century re-discovered it through his studies and re-proposed it in the splendid Venetian villas that are still to this day the distinguishing mark of his career. Stucco Veneziano is an aesthetic solution that step by step, conquered Venice and Lombardy, then Italy, and finally entire Europe in the XVII century. Today, venetian plaster Stucco Veneziano restores the splendor of a classic and prestigious finish.
Color Palette
Create any color your heart desires
The color recipe for the following tutorial is for creating a classic, antique plaster effect, ideal for most rooms and an excellent base color for hand-painted fresco elements. You can also create additional plaster wall color tones, in virtually any color combination. For additional color recipes visit the artsparx color palette. To create alternate colored plaster walls, simply follow this step-by-step tutorial, substituting the base color suggested below with the base color specified in each color recipes at the artsparx color palette, and complete the effect using the glaze recipe from the selected Color Palette tutorial.
Base Color Quartz Primer - Un-tinted White

Step-by-step tutorial starts here...
Step 1: Preparing your surface
Remove all nails and repair any damaged or cracked areas. Prime as needed. Refer to the artSparx basic preparation resource for tips and techniques.
Tape off all baseboard edges, ceiling edge, trim, window and door frames. Remove all electrical and light switch cover plates. Cover furniture and floor areas with drop cloths.

Step 2: Choosing a base color and preparing materials.
For you basic aged plaster effect you will start with a slightly off-white latex flat wall paint. Benjamin Moore Linen White works well as an off white base tone. In addition, Plaster of Paris is required, plus a couple of plaster trowels, 1 gallon bucket and some disposable gloves.
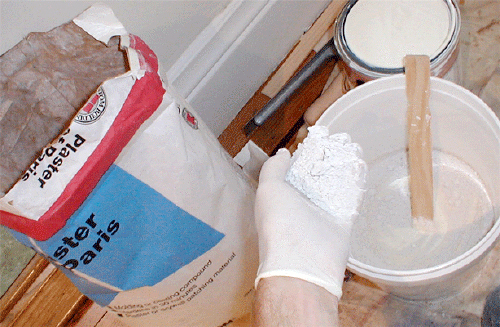
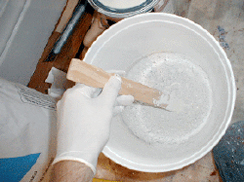
Step 3: Mixing your 'fresco' plaster compound
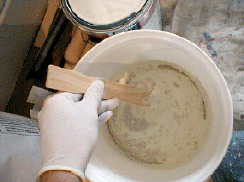
You will be mixing the plaster/paint combination in small batches, to insure the compound does not dry out and become unworkable as you move along your room. Use a 1 gallon bucket and pour approx. 1 quart of your latex flat wall paint (Benjamin Moore Linen White) into the container. Slowly add handfuls of Plaster of Paris, stirring the mixture thoroughly to insure the plaster becomes fully integrated in the paint.
Continue to add plaster until you have created a mixture with a smooth putty consistency.
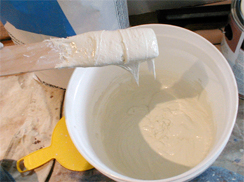
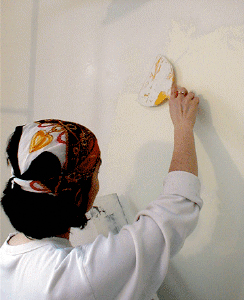
Step 5: Applying the plaster compound.
Once you have thoroughly mixed your plaster-paint compound you can begin to trowel on the plaster over your wall surface. Place a portion of the plaster compound in a plaster trough and, beginning at the top of your wall, spread the plaster mixture over the surface with a wide, flat trowel or putty knife.
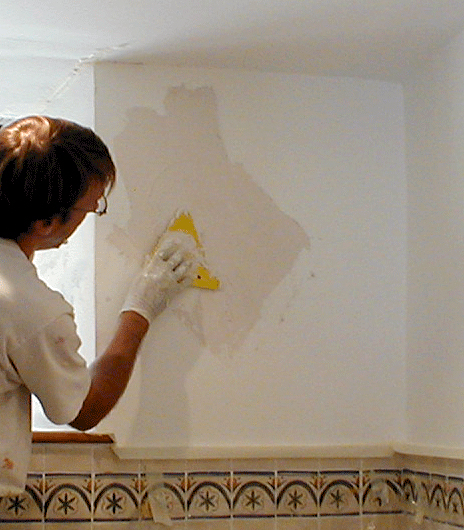
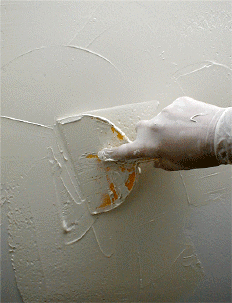
Step 6: Smoothing and creating texture.
Spread the plaster thinly over the wall, adding more as needed. Using a second trowel or putty knife, continually wipe blades together to remove excess plaster build up on the trowel edge. This also helps you re-work the plaster surface without dragging more plaster over the wall.
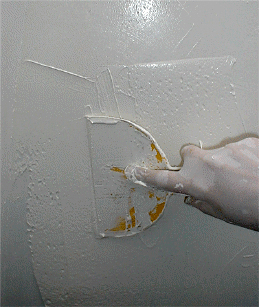
Create slight variations in texture over the surface by dragging the trowel blade over the surface. Experiment with different amounts of pressure applied to the blade. A light, even pressure will cause the trowel edge to 'skip' over the surface, creating variations in surface texture. A harder, firmer texture will result in smoother areas. Try and develop a nice blending of smooth areas, with occasional, irregular textures.
Use broad even strokes to smooth out the plaster.
Creating a slight texture is an important part of the antique fresco appearance.
Carefully re-work the plaster to smooth and create light texture.
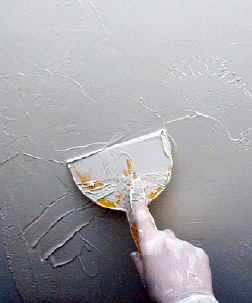
Wipe the trowel blade against another putty knife frequently to remove excess plaster build up.
Allow the plaster walls to dry completely. This may take up to 12 hours.
Completed plaster surface. Allow the plaster walls to dry completely. This may take up to 12 hours.
Completing the fresco process
You are now ready to move onto the next stage, Antique glazing and distressing the plaster surface.
Series 2 - Antique glazing and distressing
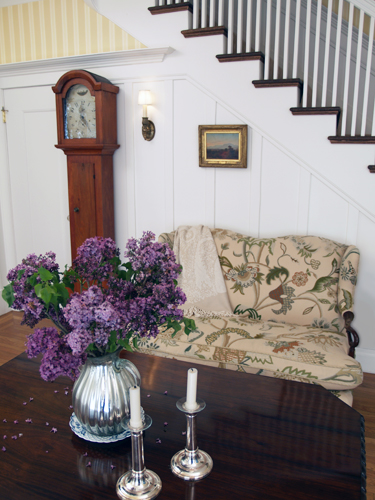
Early American Style
Colonial Amercians drew inspriation from their European heritage. Curent design styles would filter across the ocean and become reinventedin early America. Proportion and scale took reign over ornementation, A neutral color palette of grey blue, greens and rose pinks is readily apparent.
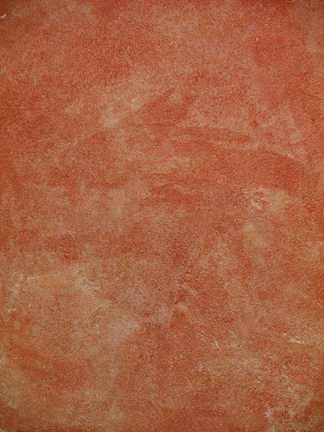
Stucco Rustico - Aged Plaster
Stucco Rustico is a Traditional interior and exterior textured plaster that epitomizes the rustic old world charm commonly associated with Tuscan environments. I love this treatment for its ease of application and the natural, organic glazed appearance that results when using mineral based plasters and glazes. Whether a rough application or a smooth finish, this treatment holds true to the test of time and, in fact, feels as if time itself stopped to wash the walls personally.

The Rustic Color Palette
The Rustic Style color palette falls within a distinct range of color tones and is essential in creating a successful Rustic interior. By using the appropriate color tones you can create a variety of design styles ranging from Period and Historic, regional or thematic. Color helps define our experiences within an interior and exterior environment. It affects us on a physical, emotional, and spiritual level and can be calming and passive, expressive and vital.
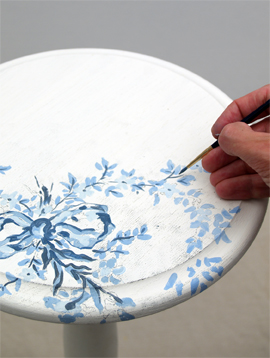
Painted Floral Details
Floral patterns used as accents in fabrics and furniture are common place details in the English Country home. These graceful and organic patterns complement the cozy interior of this style and work particularly well with lace window treatments, an heirloom tea service set and the natural and rustic charm of wooden ceiling beams and slightly irregularly textured walls.