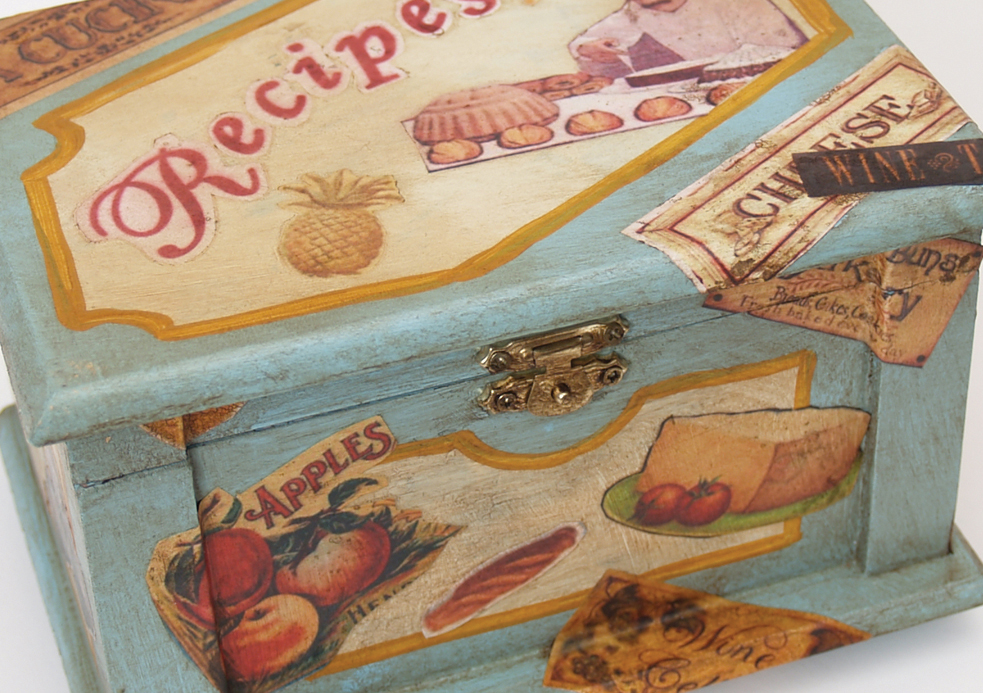
Decoupage, the art of applying cut out imagery to furniture and objects, flourished in Europe during the 18th and 19th centuries. I wanted to introduce this demonstration as an effective treatment for objects, in this case a recipe box, because it seems to fit so well within the French Country style. Colorful, interesting and unlimited in potential, decoupage can offer a simple design solution for dressing up many common items within the home, including boxes, trays, chests and tables.
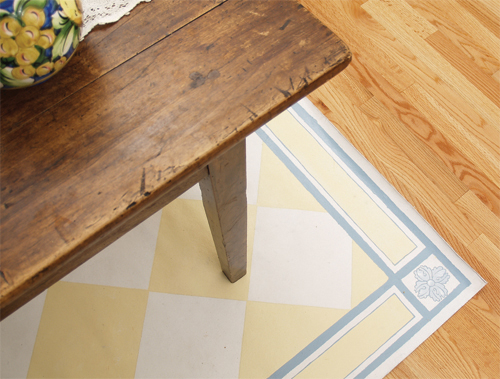
Freshen any room with this creative checker board painted floor cloth.
The magic of a painted floor cloth can transform a common space into a unique and beautiful expression of you and your family’s personality. Use these versatile cloths for entrance floors, children's rooms, porches, or just about anywhere. Due to the hand painted nature of each floor cloth there is a great opportunity to customize an interior detail to the home, adding quirky elements and personal touches that help create these singularly unique painted floor cloths.
TIPS
Secure images to the surface. Using a small roller will help press the images onto the surface. But to ensure a proper bond, simply press the image over regular intervals as the glue dries. If a small corner lifts up, apply some glue with a toothpick to the desired area and press firmly until it is secure.
Chateau Blue

Glaze color
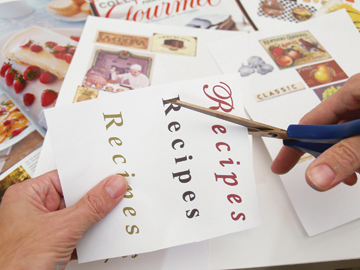
Select images.
Selecting images for decoupage can be a fun and creative process, and you'll probably find you have more images on hand than you know what to do with. Choose clippings from magazines and books. Try to be selective and have a final vision in mind to help pinpoint the type of imagery that best suits your project. Floral patterns, fancy script or lettering, fleur-de-lis and scrolls all work well for this technique. In this instance, we used food related images from vintage pictures and old stock photos to help create the rustic charm we desire.
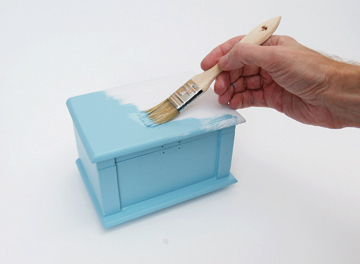
Step 1:
I’ve selected a small box to use as my recipe card holder. After priming the surface with white spray primer, I apply my base color, Chateau Blue with a 1 inch brush.
Selecting images for decoupage can be a fun and creative process and you’ll probably find you have more images at hand than you know what to do with. Choose clippings from magazines and books. Try to be selective and having a final vision in mind will help considerable in pin-pointing the type of imagery that best suits your project. For French Country floral patterns, fancy script or lettering, fleur-de-lis and scrolls all work well. I’ll be selecting food related images from vintage pictures and old stock photos that will help create the rustic charm I am after for this project.
Step 2:
Select a variety of pictures in varying sizes and trim them with sharp scissors to isolate the desired image. It helps to cut at a slight inward angle to create a beveled edge. Lay these image out so you can get a feeling for the layout and how the images work with one another.
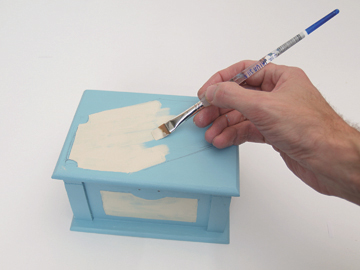
Step 3:
I like my boxes to have a bit of a painted frame work onto which I can apply my images. After I’ve selected the images I want to use, I begin to block out areas on the box with Linen White paint using a small brush.
Step 4:
Next I use my No. 1 round brush to outline these shapes with Yellow Ochre paint.
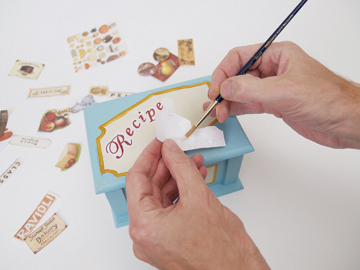
Step 5:
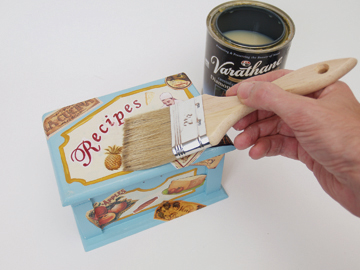
It is time to start adding the cut-out images. I begin by diluting white glue slightly with water and brush this onto the back of the image, starting in the center and brushing outward. I then carefully lay the image onto my desired location. Press firmly.
Using a small roller will help press the images onto the surface. But to insure a proper bond, simply press the image over regular intervals as the glue dries. If a small corner lifts up simply apply some glue with a toothpick to the desired area and press firmly until it is secure.
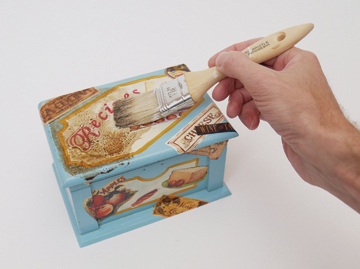
Step 6:
When I have completed by decoupage application and the images have all dried fully and securely, I’ll seal the entire surface using clear satin water-based varnish. Though spray cans will work sufficiently, I generally prefer brushing on varnish. This will provide a thicker build up of sealer and since 4 or more coats are required, the procedure tends to move quicker.
Step 7:
After I’ve applied 2 coats of varnish an antique glaze can be added. This will subdue the images, helping to create a time aged appearance. Mix Raw Umber and Burnt Umber, diluted with water, and loosely wash over the entire surface.
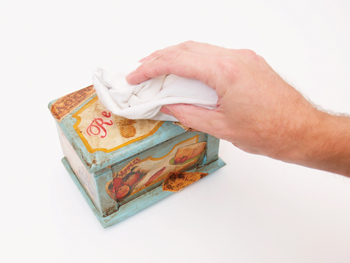
Step 8:
Using a clean rag, rub, blot and soften the antique glaze. When this is dry add 2 or more additional layers of varnish.
Colonial Amercians drew inspriation from their European heritage. Curent design styles would filter across the ocean and become reinventedin early America. Proportion and scale took reign over ornementation, A neutral color palette of grey blue, greens and rose pinks is readily apparent.
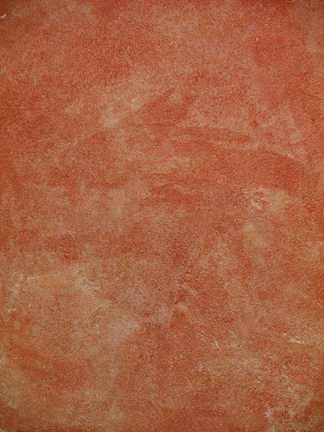
Stucco Rustico is a Traditional interior and exterior textured plaster that epitomizes the rustic old world charm commonly associated with Tuscan environments. I love this treatment for its ease of application and the natural, organic glazed appearance that results when using mineral based plasters and glazes. Whether a rough application or a smooth finish, this treatment holds true to the test of time and, in fact, feels as if time itself stopped to wash the walls personally.
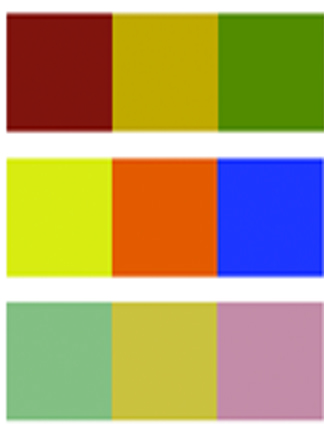
The Rustic Style color palette falls within a distinct range of color tones and is essential in creating a successful Rustic interior. By using the appropriate color tones you can create a variety of design styles ranging from Period and Historic, regional or thematic. Color helps define our experiences within an interior and exterior environment. It affects us on a physical, emotional, and spiritual level and can be calming and passive, expressive and vital.
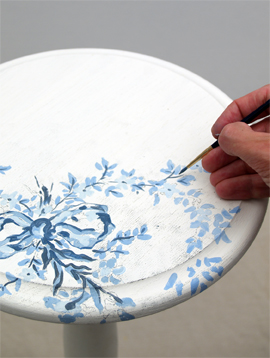
Floral patterns used as accents in fabrics and furniture are common place details in the English Country home. These graceful and organic patterns complement the cozy interior of this style and work particularly well with lace window treatments, an heirloom tea service set and the natural and rustic charm of wooden ceiling beams and slightly irregularly textured walls.