Painted Ochre Marble finish - How to paint faux marble          

Transforming everyday furniture and objects....

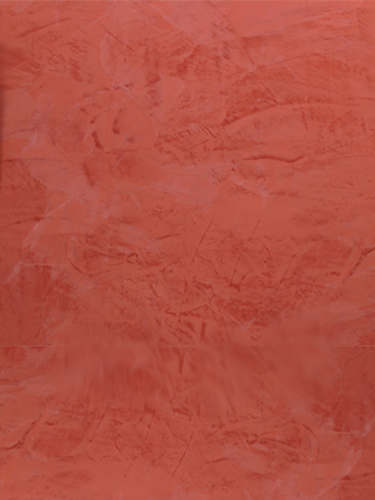
We started with a piece of furniture, found at the Salvation Army. It possesses a nice shape, but was in pretty poor condition. We decided on a light antique striee glaze on the cabinet and a strong, robust ochre marble for the top.

Special Feature
Inlayed floor tutorial

Painted Inlay Floor Border

This process imitates the appearance of individual pieces of wood inlayed as a border to a wooden floor. A variety of patterns can be created, often imitating an assortment of wood types such as mahogany, oak, pine, ebony and maple.  I’ve found this treatment to be a successful method of creating a period feel within a range of styles. And since there are very few design limitations you can create wonderfully unique floors to fit your style.

more


polished venetian plaster

Lithos Venetian Plaster

Finishing Venetian Plaster with natural polished marble effect

In Stock

Lithos is the contemporary version of the famous ancient Stucco Veneziano. It is a beautiful and highly refined decorative finish for hotels, offices, shops, exhibition halls, living rooms, etc. Ideal for all types of interior surfaces such as cement renders, Gypsum plasters, prefabricated panels wood and its by-products, as long as sufficiently smooth. With the range of colours and the applicator’s capacity and inspiration, it is possible to attain a variety of designs and chromatic effects. The resulting coating, in addition to being highly attractive, is abrasion resistant and washable.

Spread rate: 35 to 45 sq. ft. per quart.

0.8 - 1.0 kg/m² (for a recommended dry film thickness of 1,0 mm)

Buy Now!


marbel-step-1

Step 1:

Remove all nails and repair any damaged or chipped areas. Prime as needed. Refer to the artSparx basic furniture preparation resource for tips and techniques….

Step 2:

Apply the appropriate eggshell finish base color. A latex off white paint, such as White Dove , will work well.  Allow to fully dry (8 hrs).

TIP: Looking at real marble for inspiration can help tremendously. Look closely at the direction of the veins and how they cross and weave together.


marbel-step-3

Step 3:

Begin the first phase by applying broad, loose swatches of color. Ben Moore latex ochre is a nice, rich ochre color.  Choose a direction you want the marble to flow in, usually at a slight angle from right to left, or vise versa. Work in squiggly motions, leaving large open areas of the base coat showing through.


marbel-step-4

Step 4:

Now add some cream tones, working into the white areas created from the previous process. Begin to connect these open areas by dragging paint from one area to another. You can lightly soften (blending the colors) with a dry brush. Use a light touch and gently brush over the 2 colors while still wet. Brush in the direction of the marble you are creating.

Adding Veins to your marble. The veining process can be fun and exciting. You can add as many layers as you want.


marbel-step-5

Step 5:

Mixing Raw Umber, Raw Sienna and white, we create our first veins. First start in the direction you have created for your marble. Occasionally break off and connect one vein to another by moving in an opposite angle. 

By applying different amounts of pressure on your brush you can create thick and thin lines randomly. 'Rolling' the brush with your fingers as you paint creates swirls and odd character lines that help boost the marble like impression.


marbel-step-6

Step 6:

Once finished with this color, begin again with a secondary vein color. Mix Burnt Sienna, Raw Sienna and white together. Brush color over surface, painting larger areas if you wish, but make sure you apply the color in a wash, allowing the colors from underneath to show through.


marbel-step-7

Step 7:

Now be dramatic. Add veins of bolder color. Keep this process simple, adding color in certain areas only. Mix Burnt Sienna and a little red together, this time don't add any white.

You should now have an overall appearance similar to the picture below. It may look a bit messy, but at this stage that's OK.

Veining – Phase 2: Now you can add your white veins. This process spiders webs across the entire surface and helps reinforce the 'depth' of the marble.


marbel-step-8

Step 8:

Work freely. Connect veins to each other, sometimes following lines that were created in earlier processes, sometimes deviating in sharp, dramatic directions. Vary the pressure on your brush to create thick and thin lines.

Antiquing the marble surface Now let's subdue the marble surface, creating an aged feeling while 'pushing' the colors back to a more muted tonality.


marbel-step-9

Step 9:

Using Raw Umber, mix with Floetrol or latex glazing liquid.


marbel-step-10

Step 10:

Use a damp rag and wet the marbled surface with water. This helps your glaze to move around and extends drying time. Brush the antique glaze you created loosely over marbled surface, then rub with a rag to soften the color. You can also blot or dab the surface to create a slight variation of texture.

TIP: Large surfaces work quickly and in segments. Apply color to one area, soften and blot with a clean rag, then continue on over surface.


marbel-step-11

Step 11:

Applying a protective varnish coat To protect the surface, a water-based varnish, such as latex varnish , may be applied after marbled surfaces have dried completely (4 hrs). A satin or semi-gloss sheen is best suited for this type of treatment.

Step 12:

Clean up with warm, soapy water.


Related Features